When I walk by an interesting house at night, I can’t help glancing in the windows to see how it looks inside. I know some people think that’s wrong, but I’m just so curious. I often wish someone would offer me a tour. For those of you who feel the same, I bring you this virtual tour of my mom and step-dad’s new house renovation (which I photographed but did not decorate, aside from the occasional consult).

Exterior Before
For many years Mom and Kent have talked about building a house. They looked and looked for the right piece of property, but they just couldn’t find what they wanted. So instead of buying an empty piece of land, they bought a house just outside of town that abuts the rail trail and the river.

Exterior After
I must confess, when they first bought this place, I was not convinced. It’s fairly new construction, the finishes weren’t to my taste or theirs, and it didn’t have much character to speak of. But they had great vision, as well as the help of Jodyn, a truly talented builder who is also Kent’s son.

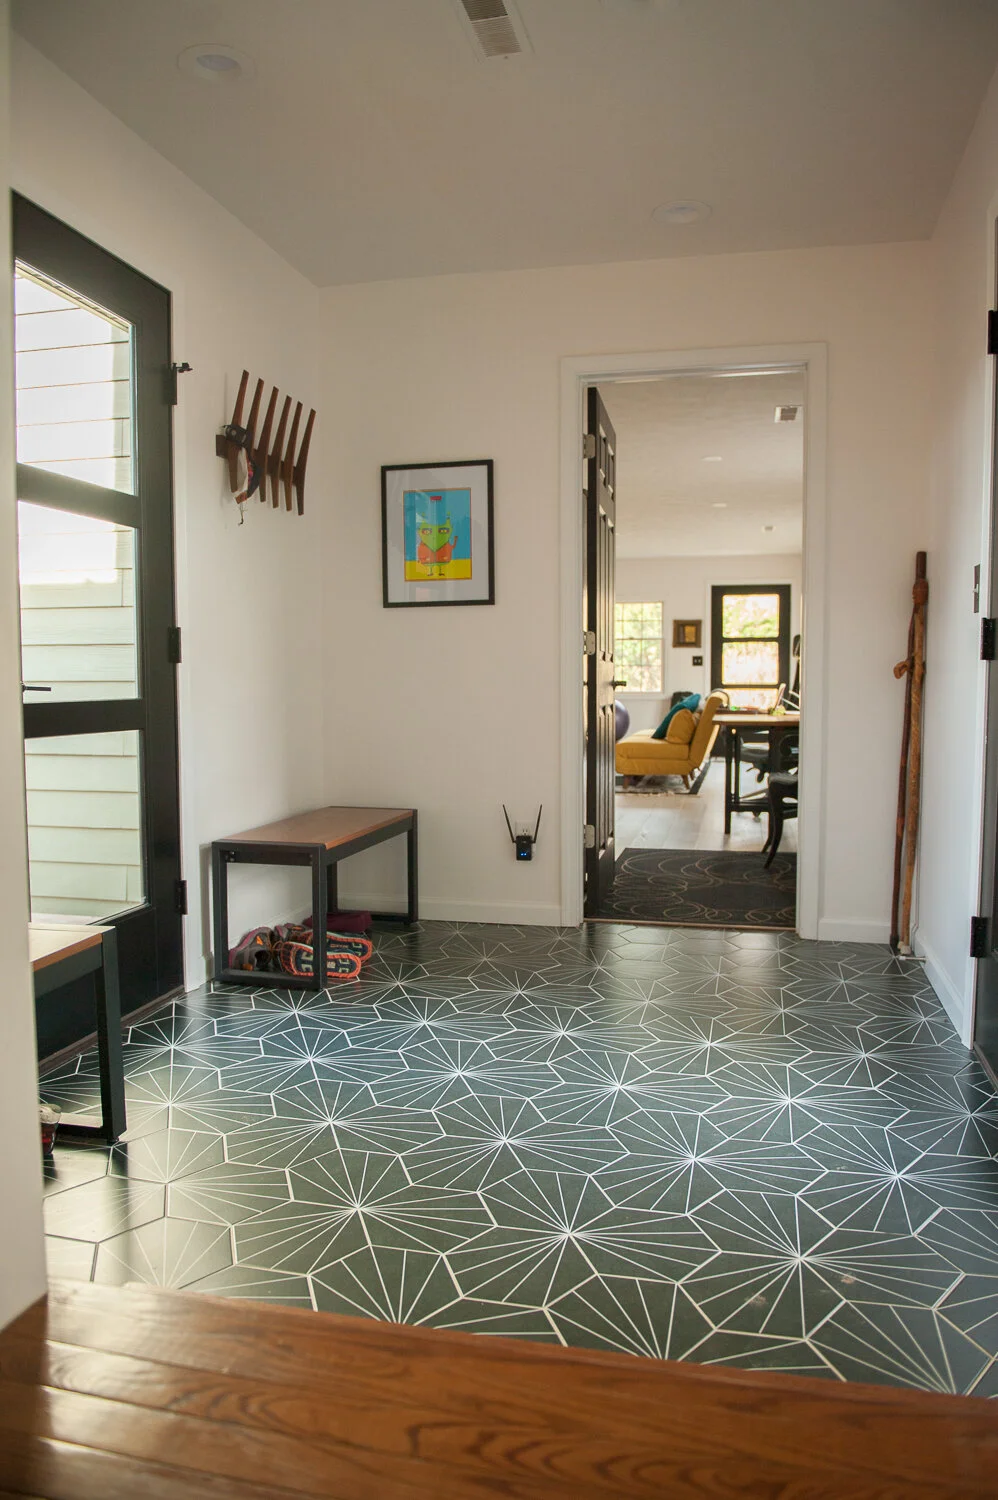
Entryway Before
Not only does Jodyn have great technical skills, but he brings his own creative ideas and sense of design. His craftsmanship is tight, which you can see here in the entryway stairs he completely transformed.

Entryway After

Living Room Before
They painted the interior walls throughout the entire house white, which used to be a no-no, but has come back in recent years.

Living Room After

Living Room After

They changed out fixtures in all the bathrooms and gave the kitchen a major overhaul.

Kitchen Before
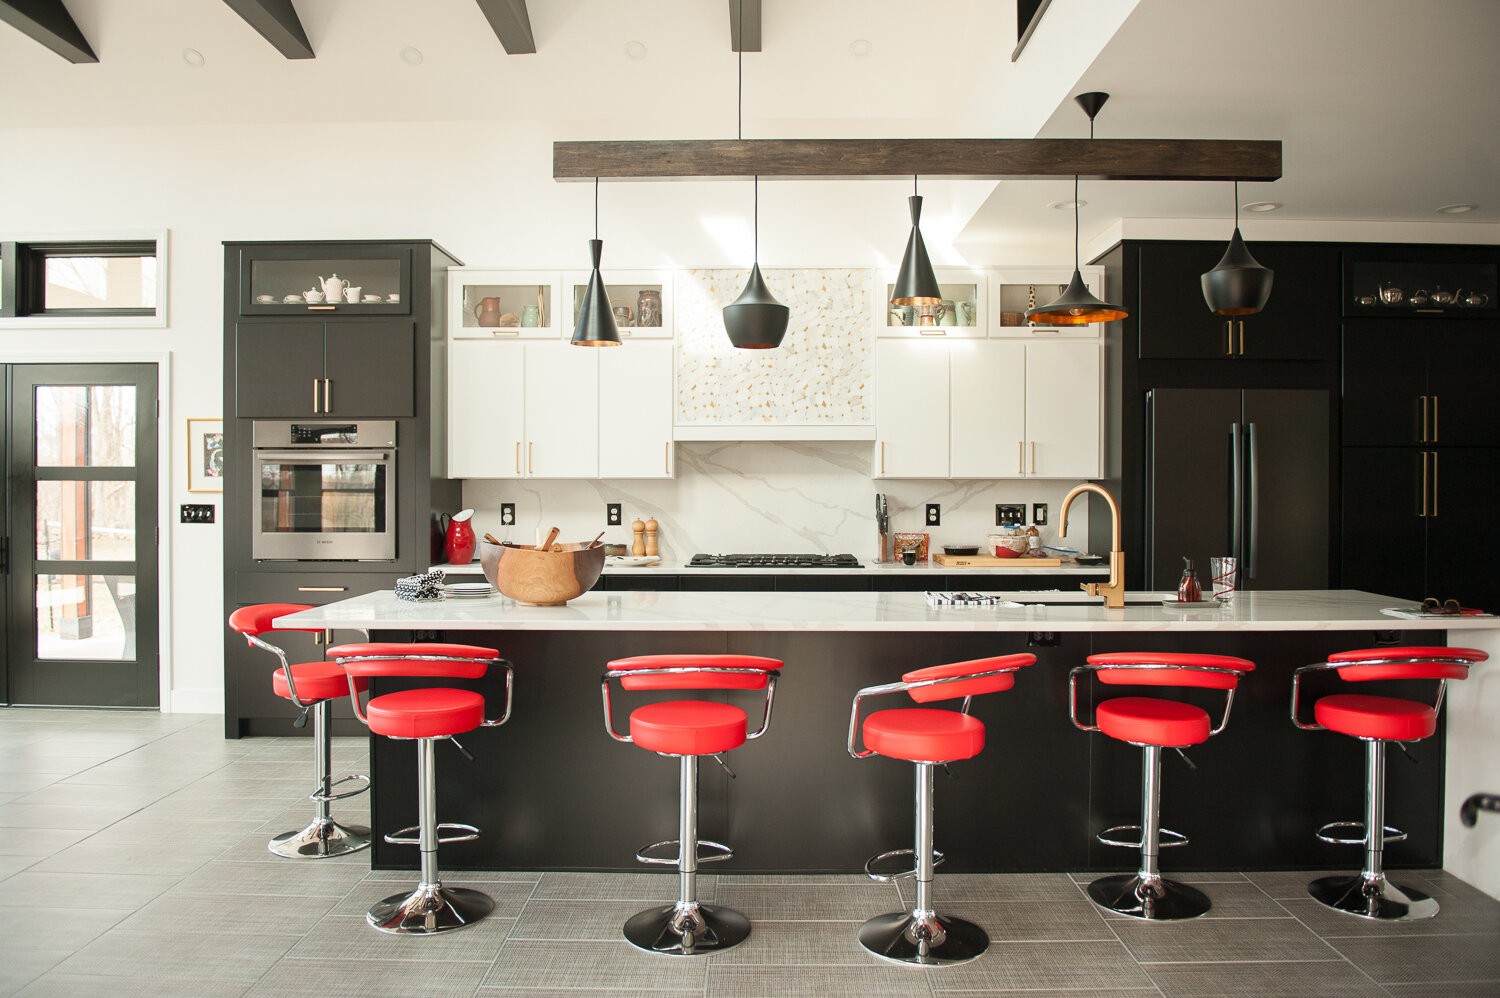
Kitchen After
Jodyn added an addition to the back of the house that extended the kitchen significantly and added a dining space beyond it. The addition is flanked on either side by porches, which are joined by a wraparound deck. Floor to ceiling windows and skylights make the space dramatic and amazingly bright.

New Addition


Exterior View of Addition

This is their retirement home, so naturally it has not only a hot tub, but also an outdoor kitchen with both a cooktop and a grill. They repurposed cabinets from the house’s original kitchen and painted them black.

Outdoor Kitchen and Hot Tub!
No retirement home would be complete without a designated bar area, right?

More kitchen cabinets were repurposed in the laundry room, this time painted a bright, cheery green. It almost makes laundry seem fun.

Laundry Room After
Jodyn custom-built this beautiful vanity for the powder room off the main entryway out of wood sawed by our multi-talented friend Daniel Raines.

Downstairs Powder Room

Den Before

Den After
Jodyn added floor-to-ceiling built-in shelves in the den, which give it a cozy library feel.

Den After
Side Entry
This side entry leads out to the detached garage on one side and to the hot tub on the other.

Mother-in-Law Suite Before
Shortly after the former owners built the house, one of their mothers became ill, so they turned their garage into an attached mother-in-law suite with a full kitchen, bedroom, and bath.

Mother-in-Law Suite After
Mom is now using that space as a studio and workout area. She wasted no time after retiring last year and immediately started painting, which she’s been too busy to do for years. She’s been experimenting with new techniques and has already produced several really great abstracts. And here I was worried she wouldn’t know what to do with herself after so many years of working.

Mother-in-Law Suite Bedroom After

Top-of-the-Stairs Nook Before
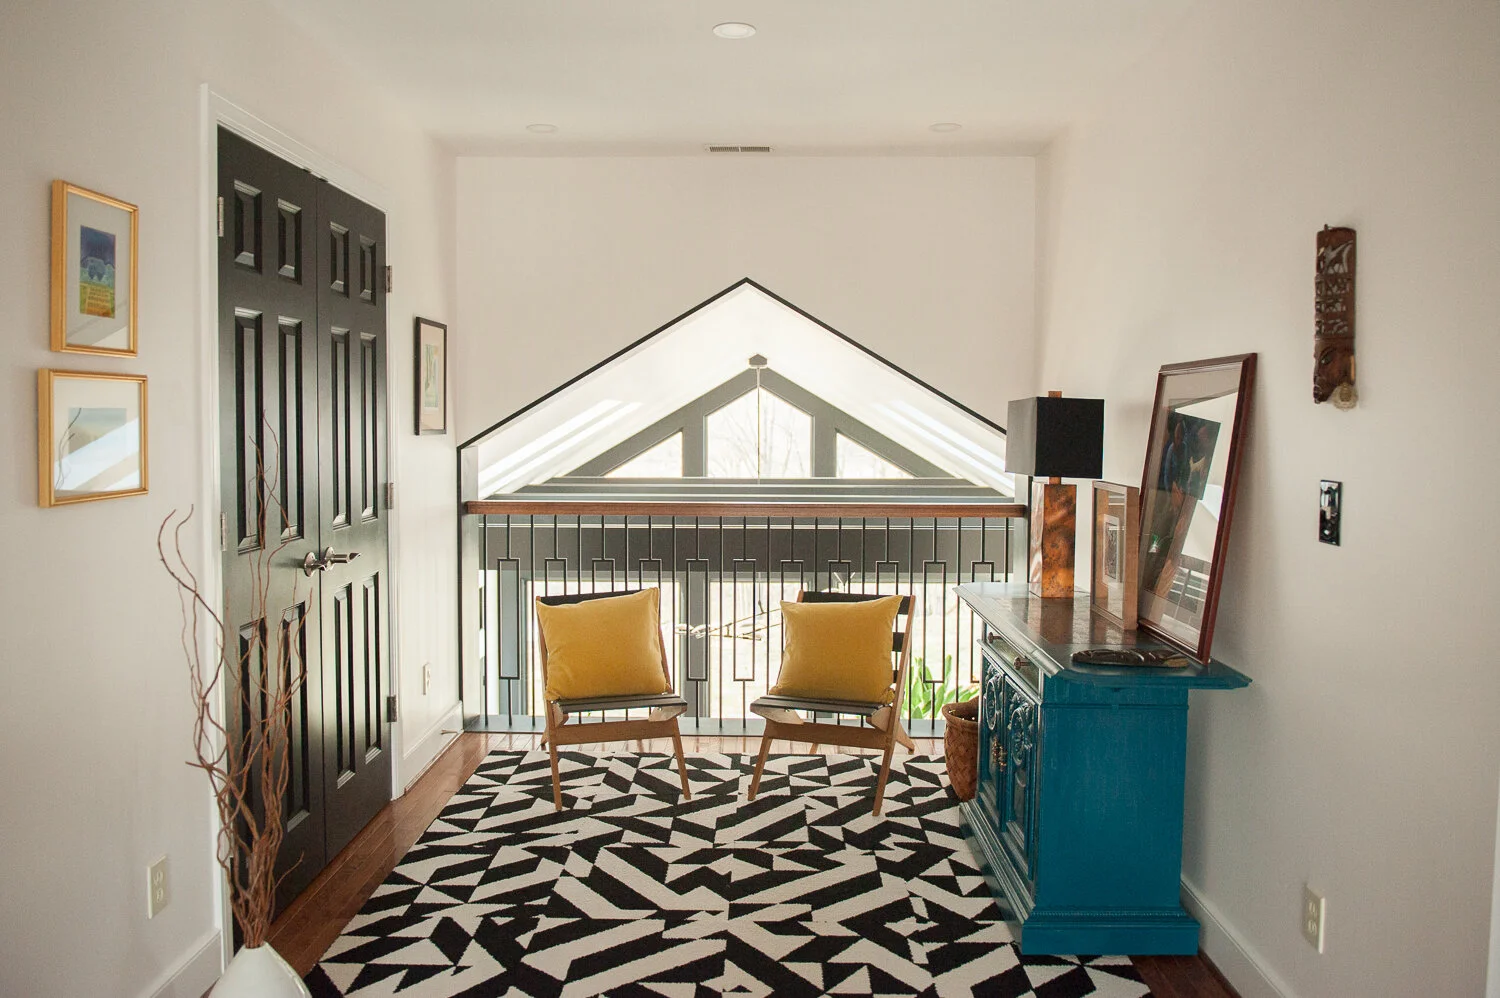
Top-of-the-Stairs Nook After
Upstairs they replaced carpet with hardwood that matches what’s downstairs. All the walls were painted white there too, and the doors black. The black doors are another thing I wouldn’t have believed until I saw it (though it is certainly a trend). Suddenly those inexpensive hollow doors look very sophisticated.

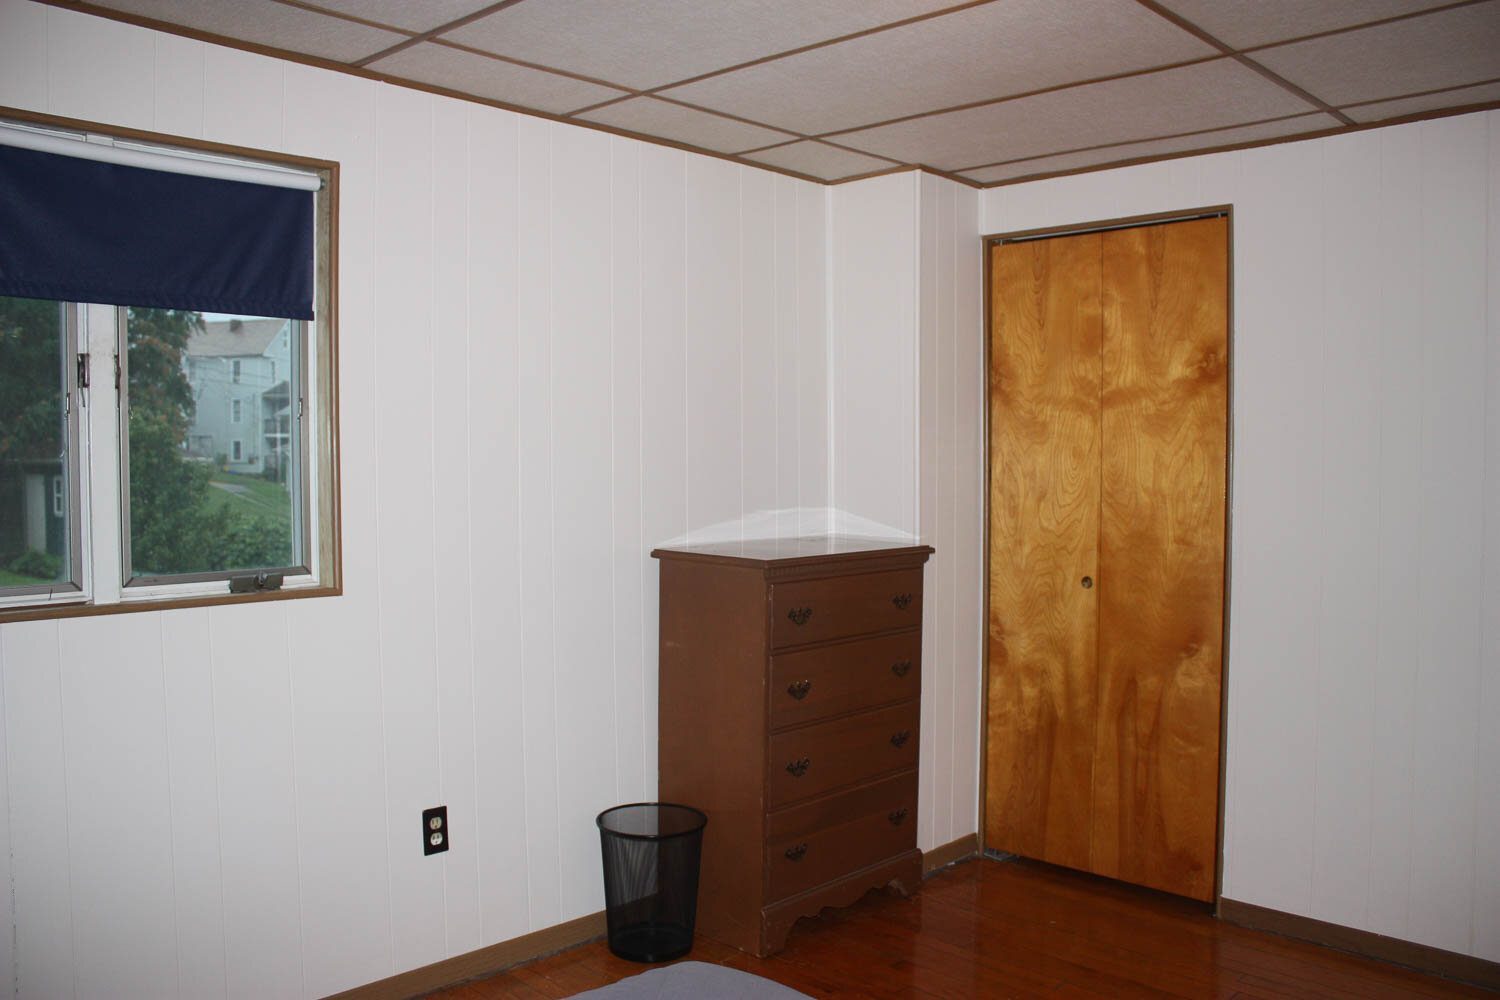
Front Bedroom Before

Front Bedroom After

Back Bedroom Before

Back Bedroom After

Upstairs Bath Before

Upstairs Bath After
In addition to switching out all the fixtures in the upstairs bath, they added a small round skylight that makes it seem as though there’s a light on all the time.

Master Bedroom Before

Master Bedroom After

Master Bedroom to Bath Before
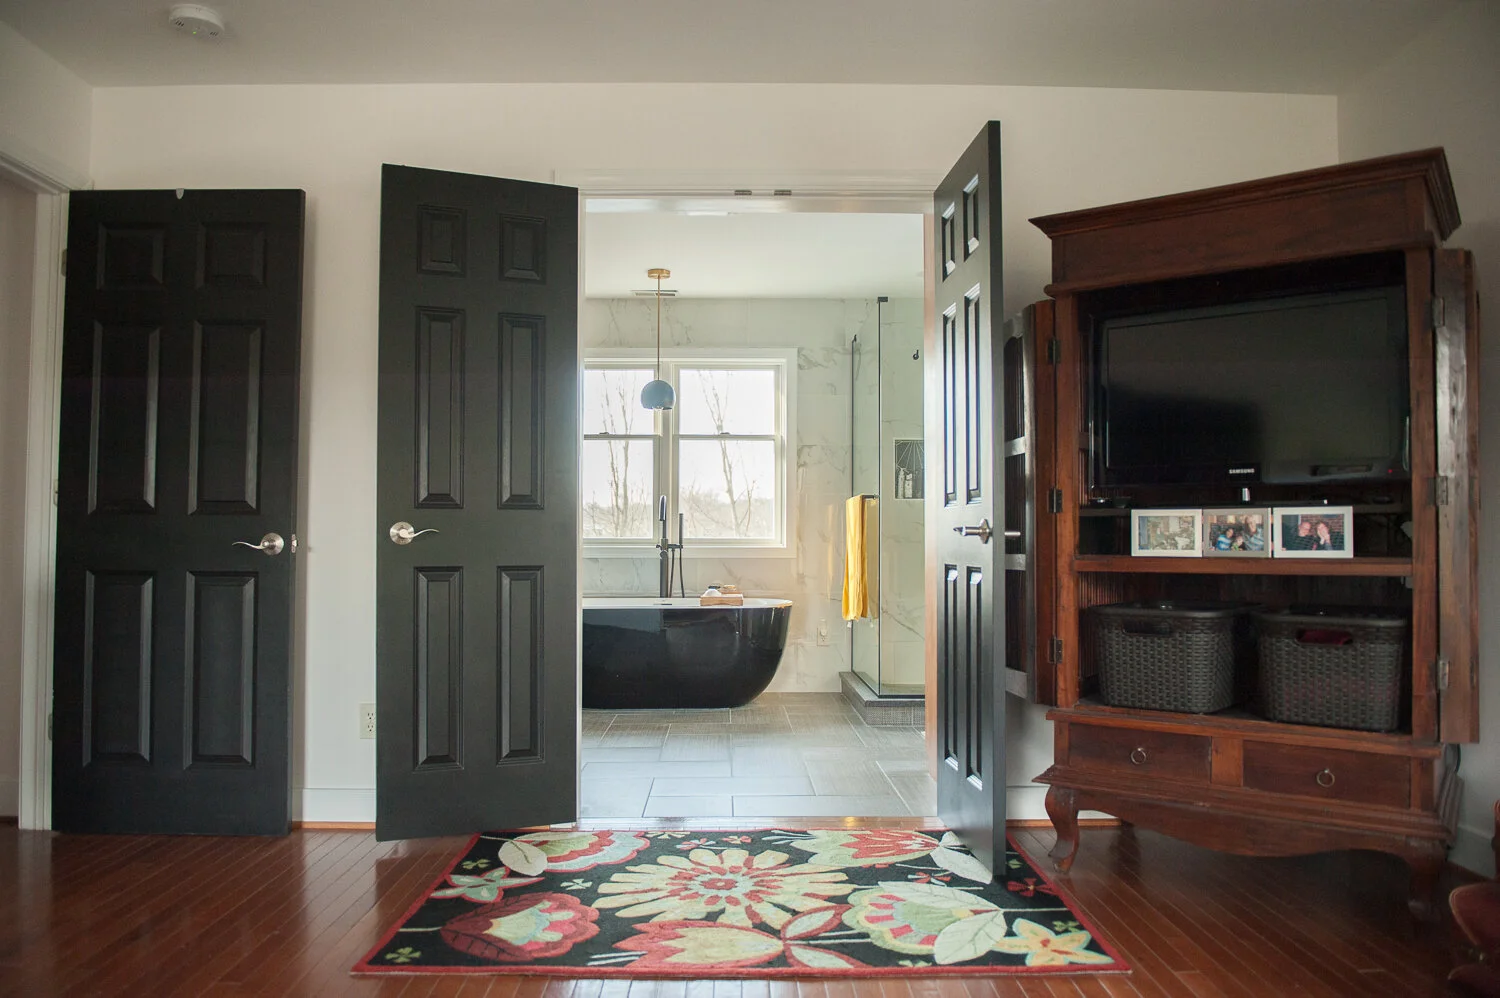
Master Bedroom to Bath After

Master Bath Before

Master Bath After

Master Bath After
It’s truly an amazing space that only a few people have been able to see, thanks to this stupid pandemic. I know I’m not alone when I say this thing needs to end soon. We are all SO ready to come back together and christen this house with its very first (dare I say epic?) family party.